This article carefully explains seven possible health problems that can be caused by ear odor in dogs, the causes of each type of odor, signs that a veterinary visit is necessary, examinations and treatments at animal hospitals, and safe care and prevention methods that can be done at home, all in a way that is easy for pet owners to implement.
Why Cleaning Your Dog’s Ears Matters
Clean, healthy ears help dogs hear well, stay comfortable, and avoid pain. Ear canals in dogs are long and curved, so wax, dirt, and moisture easily become trapped. Without regular care, the trapped material can lead to irritation, bad odor, and infections that are difficult to treat.
Gentle cleaning also lets owners notice early changes such as redness, swelling, or unusual discharge. Early detection often means simpler treatment and less suffering for the dog. Routine ear care is therefore an important part of overall dog health, just like nail trimming and dental care.
Health problems dirty ears can cause
Dirty ears are not only smelly; they can lead to painful and sometimes serious health problems. Built‑up wax and dirt trap moisture, creating a perfect environment for bacteria and yeast. Over time, this often causes ear infections, redness, itching, and a strong odor. If inflammation continues, dogs may develop chronic otitis, thickened skin, and even narrowing of the ear canal. In severe cases, untreated ear disease can damage the eardrum, affect hearing, and spread deeper into the middle or inner ear.
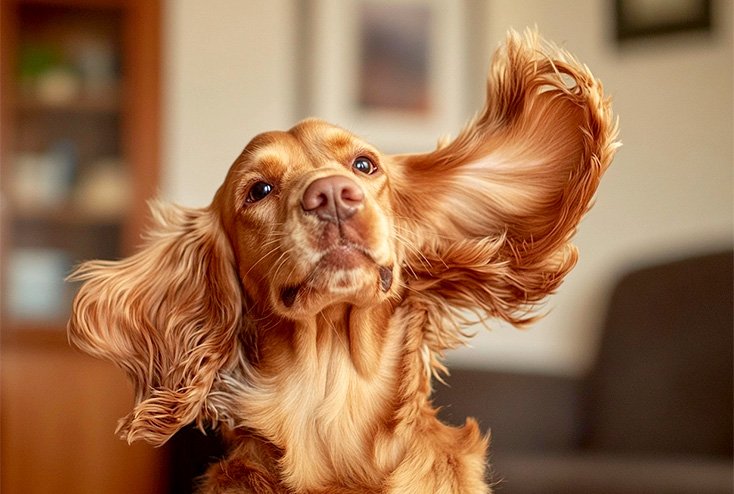
Dogs and breeds that need extra care
Some dogs are more prone to ear trouble and need more frequent checks and careful cleaning. Dogs with floppy ears (Cocker Spaniels, Basset Hounds, Beagles), heavy ear feathering (Poodles, Shih Tzus), or narrow ear canals (Shar-Peis) trap more heat and moisture.
Allergy‑prone breeds such as Bulldogs, Retrievers, and Terriers often develop chronic ear inflammation. Dogs that swim often, work outdoors, or live in humid climates also need extra ear care and regular vet checks.
How to Tell If Your Dog’s Ears Need Cleaning

Dog ears do not need to be completely spotless. A small amount of light brown wax with no odor or redness is usually normal. Cleaning is needed when owners notice clear changes from that usual state.
As a rule of thumb, consider cleaning when: the inner ear looks dull or dirty, there is more wax than usual, or a mild, new smell appears without other signs of pain. Dogs that swim often, have floppy ears, or roll in dirt may need cleaning sooner because moisture and debris build up more easily. Regular visual checks help decide the right timing.
Normal ears vs. problem ears
Healthy dog ears are clean, pale pink, and only mildly waxy, with no strong odor. A small amount of light‑brown wax and occasional head shaking are normal. The skin should look smooth, not thickened or scabby, and the ear flap should move freely without pain.
Problem ears often look red, swollen, very waxy, or greasy. Dark brown or yellow discharge, crusts, a bad smell, or moist build‑up suggest trouble. If a dog resists touch, cries when the ear is handled, or the canal looks very narrow or lumpy, ear disease is likely and a vet visit is recommended before cleaning.
Common signs of ear trouble
Common ear trouble often starts with subtle changes. Owners should watch for:
- Frequent head shaking or ear scratching
- Rubbing the head on floors or furniture
- Redness or swelling inside the ear flap
- Brown, yellow, or bloody discharge
- Strong or unpleasant odor from the ear
- Sensitivity when the ear is touched, whining, or pulling away
Any sudden change in smell, color, or behavior around the ears is a strong sign that a closer check or veterinary visit is needed.
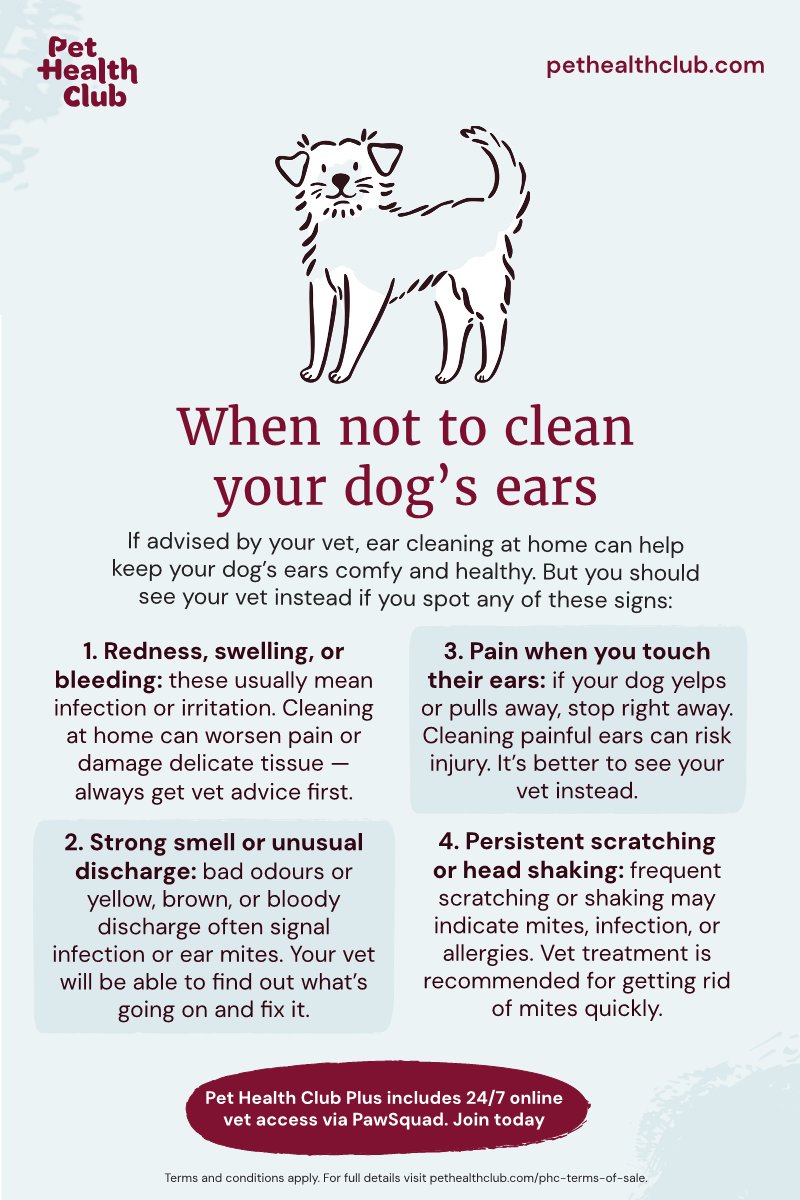
When Not to Clean and Call the Vet Instead
Ear cleaning is not always safe. In some situations, trying to clean at home can worsen pain or damage the ear. When any serious sign is present, the safest choice is to stop home care and contact a veterinarian promptly. A professional exam allows the vet to check the eardrum, find the cause of the problem, and choose the right treatment before permanent hearing loss or deep infection develops.
Warning signs of ear infection
Ear infections often cause pain and permanent damage, so early detection is important. Typical warning signs include:
- Strong odor from the ear
- Red, swollen ear canal or ear flap
- Thick brown, yellow, or bloody discharge
- Frequent head shaking or tilting
- Rubbing ears on furniture or with paws
- Crying, snapping, or pulling away when the ear is touched
If a dog shows any of these signs, avoid cleaning and contact a veterinarian promptly.
Other issues a vet should check
Some ear problems should not be handled at home, even if they resemble simple dirt or wax.
| Problem | What you may notice | Why a vet should check |
|---|---|---|
| Ear mites / parasites | Dark coffee‑ground debris, intense scratching | Needs prescription parasite treatment |
| Foreign object | Sudden head shaking after a walk, pawing at one ear | Object must be removed safely to avoid damage |
| Growths or polyps | Lumps in or around the ear canal | May require biopsy or surgical removal |
| Allergies or chronic irritation | Recurring redness, odor, frequent infections | Needs long‑term allergy or skin management |
If there is sudden hearing loss, severe pain, or head tilt and balance problems, urgent veterinary care is recommended.
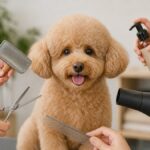
Safe Ear Cleaning Solutions and Tools
Safe ear cleaning starts with the right products and gentle tools. Owners need a vet‑approved liquid ear cleaner designed for dogs, plus soft materials to wipe the outer ear. Cotton pads or gauze are kinder to skin than cotton swabs, and a towel helps catch splashes when the dog shakes its head. Good tools allow the cleaner to dissolve wax and debris without irritating the ear canal, so the process is quick, comfortable, and reduces the risk of infection.
Dog-safe cleaners vets recommend
Veterinarians generally recommend ear cleaners made specifically for dogs, not human products. Ideal dog-safe solutions usually:
- Contain gentle cleaners (like mild surfactants) to dissolve wax and debris
- Include drying agents (such as safe alcohol derivatives) to reduce moisture
- May add soothing ingredients like aloe, glycerin, or low‑dose anti‑inflammatory agents
Popular options from clinics often include enzymatic or vet‑labeled ear cleaners. For the safest choice, owners should ask their vet to recommend a product that suits the dog’s skin type, ear shape, and any allergy history.
What to avoid using in dog ears
Certain products can irritate or seriously damage the ear canal, so they must be strictly avoided.
| Never use in dog ears | Reason |
|---|---|
| Hydrogen peroxide | Harsh, can burn delicate tissue |
| Rubbing alcohol / spirits | Painful, very drying, stings inflamed skin |
| Vinegar, lemon juice, homemade mixes | Wrong pH, unpredictable irritation |
| Human ear drops or medications | Formulated for people, may worsen problems |
| Cotton swabs (Q‑tips) inside canal | Pushes debris deeper, risk of injury |
| Baby wipes, makeup pads, tissues inside canal | Fibers can stay inside and irritate |
Only veterinary‑approved canine ear cleaners should be placed in the ear canal. When unsure, owners should confirm safety with a vet before use.
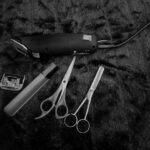
Checklist of basic supplies
A short checklist helps ear cleaning go smoothly. Essential supplies include:
- Dog‑specific ear cleaning solution (vet‑approved)
- Cotton balls or soft gauze pads
- Small towel or old cloth for splashes
- Treats for reward and distraction
- Optional: helper to gently hold the dog, non‑slip mat, headlamp or small flashlight
Prepare all items before starting so the dog spends less time being restrained.
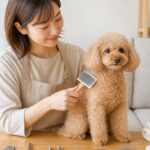
Step‑by‑Step Dog Ear Cleaning Guide

Cleaning dog ears follows a simple, safe flow. The goal is to loosen wax and debris, then wipe it away from the outer ear without pushing anything deeper. The process starts with a calm setup, a quick check of each ear, then careful use of a vet‑approved cleaner. Next comes gentle massage at the base of the ear, allowing the solution to break up dirt. After the dog shakes its head, the outer ear is wiped clean with soft cotton or gauze. The same routine is repeated on the other side, followed by praise and rewards so ear care remains a positive habit.
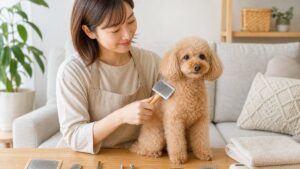
Before you start: set up and calm your dog
Before starting ear cleaning, preparation and a calm atmosphere help prevent accidents. First, choose a quiet, well‑lit space and lay down a towel or non‑slip mat. Prepare all supplies within arm’s reach so hands can stay on the dog.
Ask the dog to sit or lie in a comfortable position. For sensitive dogs, start with gentle petting and short practice sessions where ears are only touched and praised, not cleaned. Use calm voice tones and offer small treats.
If the dog shows fear or struggles intensely, stop and try again later or consult a trainer or veterinarian for handling advice.
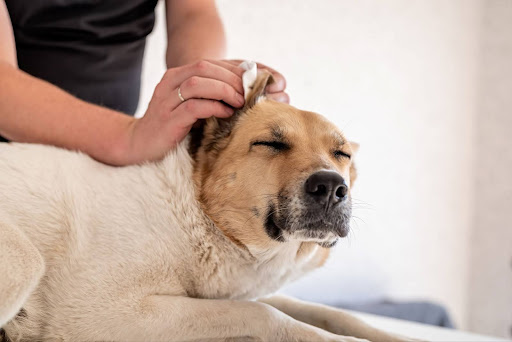
Step 1: Examine the ears gently
Before starting, make sure the dog is relaxed and the ear area is well lit. Gently lift the ear flap and look inside without pulling hard. A healthy ear is light pink, with little odor and minimal wax. Notice the color of the skin, amount and color of wax, and any moisture. Avoid poking deep into the canal; only inspect what can be seen. If the dog pulls away, cries, or the ear looks very red or swollen, stop and consult a veterinarian before cleaning.
Step 2: Apply the ear cleaner safely
Hold the ear flap up so the ear canal is straight and visible. Place the tip of the ear‑cleaning bottle just at the opening of the canal, not deep inside, to avoid injury. Gently squeeze until the canal is comfortably full but not overflowing. Avoid touching the ear with the bottle tip; if contact happens, wipe the tip with clean cotton. Do not use cotton swabs inside the canal, because they can push debris deeper and harm the eardrum.
Step 3: Massage the ear canal base
Gently hold the ear flap up and place fingers on either side of the base of the ear, where it meets the head. Using the thumb and fingers, massage in small circular motions for 20–30 seconds. The goal is to move the cleaner down the canal so it can break up wax and debris, not to press hard. A soft “squishing” sound is normal. Stop immediately if the dog pulls away sharply, cries, or seems in pain, and consult a veterinarian.
Step 4: Let your dog shake its head
After massaging the ear base, gently step back and allow the dog to shake its head. Head‑shaking is a natural way for dogs to eject loosened wax, fluid, and debris from the ear canal. Do not try to hold the head still during the shake, as restraint can cause stress and may lead to accidental scratches. Instead, protect clothing with a towel and keep the dog in an easy‑to‑clean area so the splashed cleaner and debris do not create a mess.
Step 5: Wipe away debris and excess fluid
Gently place a clean cotton ball or soft gauze at the entrance of the ear canal and wipe upward and outward to remove loosened wax and cleaner. Avoid pushing debris deeper into the ear. Do not use cotton swabs inside the canal, as they can injure the eardrum. Use several fresh pads until they come away mostly clean, then lightly dry the inner flap so the ear is left slightly moist but not dripping.
Step 6: Repeat on the other ear
After finishing one ear, simply repeat the same careful steps on the other side. Check the second ear’s appearance and smell first, because each ear can have a different condition. If one ear looks painful, very red, or has discharge while the other seems normal, stop and contact a vet before continuing. Use a clean cotton pad or gauze for the second ear so dirt and germs are not transferred from the first ear.
Step 7: Reward and help your dog relax
End each ear‑cleaning session on a positive note. Offer high‑value treats, calm praise, and gentle petting right away so the dog links ear care with something pleasant. Allow a short play break or cuddle time if the dog enjoys it. If the dog seems tense, give a quiet space to relax and avoid pushing further. Consistently rewarding cooperation helps future ear checks become easier and less stressful.
How Often to Clean Different Dogs’ Ears
Ear cleaning frequency depends on ear shape, lifestyle, skin condition, and health history. In general, most healthy dogs only need ear cleaning every few weeks. Active dogs that swim often, breeds with floppy or hairy ears, or dogs prone to allergies may need more frequent gentle cleaning. On the other hand, dogs with current ear infections or painful ears should not be cleaned at home and must see a veterinarian first.
Guidelines by activity, coat, and ear type
Cleaning frequency depends on how much debris builds up, not on a fixed calendar. As a rough guide:
| Dog type | Example dogs | Suggested frequency |
|---|---|---|
| Floppy ears (cover canal) | Cocker Spaniel, Beagle | About once a week if healthy |
| Prick/standing ears | Husky, German Shepherd | Every 2–4 weeks |
| Hairy ear canals | Poodle, Shih Tzu | Weekly checks, clean every 1–2 weeks |
| Swimming or outdoor dogs | Frequent swimmers, field dogs | Clean after wet, muddy, or dusty days |
If ears look and smell normal, cleaning can be less frequent; dogs with allergies or past ear problems often need more regular care under veterinary guidance.
Simple weekly ear check routine
A simple weekly routine keeps ear problems from sneaking up.
- Look: In good light, gently lift the flap. Healthy ears are pale pink, clean, and not smelly.
- Smell: A mild “doggy” smell is normal. Strong, yeasty, or foul odor suggests trouble.
- Listen to behavior: Notice head shaking, ear scratching, or rubbing.
- Feel: Lightly touch the ear base. Watch for flinching or pain.
- Decide: If ears look clean and normal, no deep cleaning is needed. Only clean when mild wax or dirt is visible and there is no redness, pain, or strong odor. When in doubt, skip cleaning and ask a vet.
Common Mistakes to Avoid
Ear cleaning is simple, but certain habits can quietly harm a dog’s ears or make problems worse. Owners should avoid cleaning too often, using harsh products, or going too deep into the ear canal. Many dogs also become scared if ear care is rushed or forced. Understanding common errors helps guardians protect the delicate ear tissue, keep the experience gentle, and know when professional veterinary help is safer than home care.
Practices that can damage the ear
Certain common habits can injure the ear canal or worsen hidden disease, so they should be avoided.
- Using cotton swabs (Q‑tips) inside the ear canal: pushes wax deeper and can damage the eardrum.
- Using alcohol, hydrogen peroxide, vinegar, or baby wipes: can sting, dry the skin, and delay healing.
- Scrubbing hard or using sharp objects: may scratch the delicate canal and cause infection.
- Plucking lots of ear hair at home without vet advice: can irritate the skin and increase inflammation.
- Cleaning very frequently when ears look normal: may upset the natural balance of protective wax and healthy bacteria.
Gentle handling, dog‑safe products, and staying at the ear opening help protect the ear from harm.
How to keep ear cleaning stress‑free
Ear care becomes less stressful when dogs can predict what will happen. Use the same place, timing, and short routine each time. Prepare treats, speak calmly, and start with gentle petting before touching the ears. If the dog seems tense, pause and reward relaxed behavior before continuing. Break cleaning into small steps on different days when needed. Avoid holding the dog down; instead, build trust slowly so ear cleaning feels like a normal part of grooming, not a punishment.
Helping Puppies and Nervous Dogs
Puppies and nervous dogs often find ear cleaning frightening, so the goal is to build positive experiences slowly. Short, gentle sessions work better than forcing a full cleaning at once. Use calm speech, soft movements, and plenty of high‑value treats. Start with simple touches around the head and ears on relaxed days, not only when cleaning is needed. If the dog shows fear, pause, let it move away, and try again later. Gradual training reduces stress and helps future health checks go smoothly.
Introducing ear care to a young dog
Puppies should learn ear care as part of everyday handling, not only when a problem occurs. Start very early by gently touching around the head and ears for just a few seconds, then offering a small treat. Gradually lift the ear flap, look inside briefly, and reward again. Keep sessions short and positive so the puppy connects ear handling with safety and snacks. At first, use only dry cotton pads around the outer ear, then slowly introduce a small amount of veterinary ear cleaner when the puppy stays relaxed.
Training tips for a cooperative ear check
For a cooperative ear check, slow and predictable handling is essential. Start with very short sessions focusing only on calmly touching the head and rewarding with a favorite treat. Gradually move to lifting the ear flap, looking inside for a moment, then rewarding immediately.
Use a clear routine: same place, same phrase such as “ear time,” and the same sequence of actions. Keep hands gentle and avoid sudden movements. If the dog pulls away, pause, go back a step, and end on a small success. Regular gentle practice helps the dog learn that ear checks are safe and lead to something positive.
This article provides a detailed explanation of how to safely clean your dog's ears, from choosing the necessary tools to specific steps, recommended frequency, and warning signs. It also clearly explains how to get puppies and fearful dogs used to the process, and when you should take your dog to the vet for ear problems, making it easy for even owners who are unsure about daily care to confidently clean their dog's ears.


![[Stupid dogs are cute] Introducing funny pictures and simple questions](https://with-my-dog.com/wp-content/uploads/2022/07/image4-18-150x150.jpg)
![[Bone fracture in dogs] Sometimes they don't show any pain? Explaining symptoms and treatment](https://with-my-dog.com/wp-content/uploads/2021/10/犬 アレルギー 薬 3枚目-150x150.webp)
![[Dog Allergies] Do dogs have allergies? Explaining safe foods!](https://with-my-dog.com/wp-content/uploads/2021/10/3029373_m-150x150.jpg)


![[Senior Dog Food] What kind of food does an elderly dog need?](https://with-my-dog.com/wp-content/uploads/2021/09/TSURU170308-074_TP_V-300x200.jpg)